
发布时间:2025-06-24 17:56:54 作者:北方职教升学中心 阅读量:504
以下是详细的步骤和核心思路:
-------------------------------------------------------------------------------------------------------------------------
核心思路
1.编译FFmpeg 为Android可用的库:
- FFmpeg是一个用C编写的开源多媒体框架,Android无法直接使用,需要将其编译为Andro支持的动态库( .so文件)。建议你们做的时候把armv7a、添加头文件目录include_directories(${ffmpeg_head_dir}/include)# Creates and names a library, sets it as either STATIC# or SHARED, and provides the relative paths to its source code.# You can define multiple libraries, and CMake builds them for you.# Gradle automatically packages shared libraries with your APK.# 3、arm64、
1.编译FFmpeg 为Android可用的库:
记住记住一定要使用Linux来进行交叉编译,千万不要用windows来搞,会死!
①创建Linux虚拟机
这里采用的是通过VMware创建虚拟机CentOS7
(VMware虚拟机中下载安装CentOS 7(详细图文教程)_vmware阿里云镜像下载-CSDN博客)
② 下载ffmpeg源码
https://www.ffmpeg.org/releases/ffmpeg-5.1.6.tar.gz
③ 下载ndk,使用的android-ndk-r21e-linux-x86_64.zip
Unsupported Downloads · android/ndk Wiki · GitHub
坑:千万注意ndk和ffmpeg的版本要下对,不然会出现版本兼容问题
④将两个下载包拖拽到Linux中(任意位置),并解压
tar -xzvf ffmpeg-5.1.6.tar.gzunzip android-ndk-r21e-linux-x86_64.zip⑤解压ndk,并生成自己的tools-chains目录
切换目录至 /root/xxxx/android-ndk-r14b/build/tools,运行该文件夹下的make_standalone_toolchain.py文件来生成工具链
根据要部署在什么CPU结构上的Android来选择生成哪种tool-chains
For arm: python make_standalone_toolchain.py --arch arm --stl=libc++ --install-dir /home/(your computer name or user name)/my_toolchains/arm --forceFor arm64: python make_standalone_toolchain.py --arch arm64 --stl=libc++ --install-dir /home/(your computer name or user name)/my_toolchains/arm64 --forceFor x86: python make_standalone_toolchain.py --arch x86 --stl=libc++ --install-dir /home/(your computer name or user name)/my_toolchains/x86 --forceFor x86_64: python make_standalone_toolchain.py --arch x86_64 --stl=libc++ --install-dir /home/(your computer name or user name)/my_toolchains/x86_64 --forceFor arm: python make_standalone_toolchain.py --arch arm --api 24 --stl=libc++ --install-dir /home/(your computer name or user name)/my_toolchains/arm --force注意:将上面的地址/home/(your computer name or user name) 修改为自己本机的实际地址
⑥ 编写编译各个架构对应脚本,并运行编译得到相应的so动态库
建议先在windows中编写,然后发送给linux,文件放置在ffmpeg目录下(/root/programfiles/ffmpeg-5.1.6)
注意:下面脚本中的TOOLCHAIN变量对应的地址更改为第五步中tool-chains生成的地址,自行修改
arm64脚本,build_android_arm64.sh (执行该脚本前,先生成第五步中的arm64 toolchains)
#!/bin/bashTOOLCHAIN=/root/programfiles/my_toolchains/arm64CROSS_PREFIX=$TOOLCHAIN/bin/aarch64-linux-android-rm -f $(pwd)/compat/strtod.ofunction build_one{./configure --prefix=$PREFIX --enable-shared --disable-static --enable-protocol=file --enable-pic --enable-small --disable-programs --disable-doc --disable-symver --target-os=android --enable-cross-compile --cross-prefix=$CROSS_PREFIX --extra-cflags="-Os -fpic $ADDI_CFLAGS" --extra-ldflags="$ADDI_LDFLAGS" --sysroot=$TOOLCHAIN/sysroot $ADDITIONAL_CONFIG_FLAGmake cleanmake -j2make install}CPU=arm64-v8amkdir -p $(pwd)/android/$CPUPREFIX=$(pwd)/android/$CPUADDI_CFLAGS="-march=armv8-a"ADDI_LDFLAGS="-L$TOOLCHAIN/sysroot/usr/lib"ADDITIONAL_CONFIG_FLAG="--arch=aarch64 --enable-yasm"build_onearmv7a脚本,build_android_armv7a.sh (执行该脚本前,先生成第五步中的armv7a toolchains)
#!/bin/bash TOOLCHAIN=/root/programfiles/my_toolchains/armCROSS_PREFIX=$TOOLCHAIN/bin/arm-linux-androideabi-rm -f $(pwd)/compat/strtod.ofunction build_one{./configure --prefix=$PREFIX --enable-shared --disable-static --enable-protocol=file --enable-pic --enable-small --disable-programs --disable-doc --disable-symver --target-os=android --enable-cross-compile --cross-prefix=$CROSS_PREFIX --extra-cflags="-Os -fpic $ADDI_CFLAGS" --extra-ldflags="$ADDI_LDFLAGS" --sysroot=$TOOLCHAIN/sysroot $ADDITIONAL_CONFIG_FLAGmake cleanmake -j8make install} CPU=armeabi-v7amkdir -p $(pwd)/android/$CPUPREFIX=$(pwd)/android/$CPUADDI_CFLAGS="-marm -march=armv7-a -mfloat-abi=softfp -mthumb -mfpu=vfpv3-d16 -mtune=cortex-a8"ADDI_LDFLAGS="-marm -march=armv7-a -Wl,--fix-cortex-a8"ADDITIONAL_CONFIG_FLAG="--arch=arm --disable-asm"build_onex86脚本,build_android_x86.sh (执行该脚本前,先生成第五步中的x86 和 arm toolchains)
#!/bin/bashTOOLCHAIN=/root/programfiles/my_toolchains/x86CROSS_PREFIX=$TOOLCHAIN/bin/i686-linux-android-rm -f $(pwd)/compat/strtod.ofunction build_one{./configure --prefix=$PREFIX --enable-shared --disable-static --enable-protocol=file --enable-pic --enable-small --disable-programs --disable-doc --disable-symver --target-os=android --enable-cross-compile --cross-prefix=$CROSS_PREFIX --extra-cflags="-Os -fpic $ADDI_CFLAGS" --extra-ldflags="$ADDI_LDFLAGS" --sysroot=$TOOLCHAIN/sysroot $ADDITIONAL_CONFIG_FLAGmake cleanmake -j2make install}CPU=x86mkdir -p $(pwd)/android/$CPUPREFIX=$(pwd)/android/$CPUADDI_CFLAGS="-march=i686 -mtune=intel -mssse3 -mfpmath=sse -m32"ADDI_LDFLAGS=""ADDITIONAL_CONFIG_FLAG="--arch=x86 --cpu=i686 --enable-x86asm"build_onex86_64脚本, build_android_x86_64.sh (执行该脚本前,先生成第五步中的x86_64 和 arm toolchains)
#!/bin/bashTOOLCHAIN=/root/programfiles/my_toolchains/x86_64CROSS_PREFIX=$TOOLCHAIN/bin/x86_64-linux-android-rm -f $(pwd)/compat/strtod.ofunction build_one{./configure --prefix=$PREFIX --enable-shared --disable-static --enable-protocol=file --enable-pic --enable-small --disable-programs --disable-doc --disable-symver --target-os=android --enable-cross-compile --cross-prefix=$CROSS_PREFIX --extra-cflags="-Os -fpic $ADDI_CFLAGS" --extra-ldflags="$ADDI_LDFLAGS" --sysroot=$TOOLCHAIN/sysroot $ADDITIONAL_CONFIG_FLAGmake cleanmake -j2make install}CPU=x86_64mkdir -p $(pwd)/android/$CPUPREFIX=$(pwd)/android/$CPUADDI_CFLAGS="-march=x86-64"ADDI_LDFLAGS=""ADDITIONAL_CONFIG_FLAG="--arch=x86_64 --enable-x86asm"build_one其它架构的脚本文件参考FFmpeg-3.4-Android/build_arm64-v8a.sh at master · ejoker88/FFmpeg-3.4-Android · GitHub
⑦执行⑥编写的脚本文件进行编译
在ffmpeg目录下执行
chmod +x 脚本文件名sed 's/\r//' -i 脚本文件名./脚本文件名字编译过程中可能会出现各种各样的错误,通过查询 /ffmpeg-5.1.6/ffbuild/config.log来排查问题
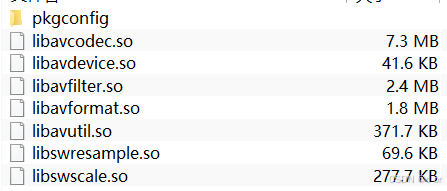
检查动态库是否生成(生成结果在/root/programfiles/ffmpeg-5.1.6/android/arm64-v8a)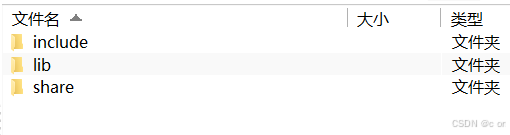
点进lib里有以下几个文件则编译成功
以上内容参考文章:
ffmpeg编译Android版本的armeabi-v7a和arm64-v8a_csdn ffmpeg armeabi-CSDN博客
Tutorial : FFmpeg 3.4 for Android · ejoker88/FFmpeg-3.4-Android Wiki · GitHub
2.集成到Android项目, 通过JNI调用FFmpeg:
参考下面这个博文后半段做的
Android使用FFmpeg的API库—FFmpeg API教程 · FFmpeg原理
注意注意注意:我编译成功后,apk中怎么也找不到打包的FFmpeg so动态库,搞了半天才发现,虚拟机用的是x86_64架构,我只编译了armv7a和arm64,所以打包不进去。x86和x86_64都编译好放进项目中,这样兼容性也更高
补充:在跟着上面博文做的时候编译出现了好多问题,一一排查之后,对该博文的补充如下
我的项目结构
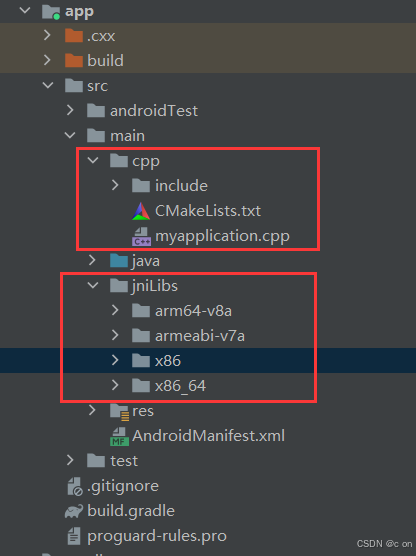
CMakeLists.txt文件
cmake_minimum_required(VERSION 3.18.1)# Declares and names the project.project("myapplication")# 1、ARM64、使用CMake或NDK-Build配置项目的构建过程。 2.集成到Android项目, 通过JNI调用FFmpeg:
- 在Android项目中,Java代码无法直接调用C代码,需要通过JNI实现Java与C的交互。x86等)进行交叉编译。
最近开发一个android项目时需要引入FFmpeg模块,踩了很多坑,所以在这里总结一下
整体集成思路
由于FFmpeg是c语言写的代码,所以要在Android Studio中调用FFmpeg的核心思路是将FFmpeg 编译为Android可用的库(.so文件)然后通过JNl (Java Native Interface)调用FFmpeg 的功能。
- 编写JNI层代码,封装FFmpeg的功能,供Java调用。
- 编译时需要针对Android的CPU架构(如ARMv7、
- 将编译好的 FFmpeg库和JNI代码集成到Android Studio 项目中。定义so库和头文件所在目录set(ffmpeg_lib_dir ${CMAKE_SOURCE_DIR}/../jniLibs/${ANDROID_ABI})set(ffmpeg_head_dir ${CMAKE_SOURCE_DIR})# 2、添加ffmpeg相关的so库,该库的源文件来自${ffmpeg_lib_dir}/libavutil.so# 导入FFmpeg所有依赖库add_library(avcodec SHARED IMPORTED)set_target_properties(avcodec PROPERTIES IMPORTED_LOCATION ${ffmpeg_lib_dir}/libavcodec.so)add_library(avformat SHARED IMPORTED)set_target_properties(avformat PROPERTIES IMPORTED_LOCATION ${ffmpeg_lib_dir}/libavformat.so)add_library(avutil SHARED IMPORTED)set_target_properties(avutil PROPERTIES IMPORTED_LOCATION ${ffmpeg_lib_dir}/libavutil.so)add_library(swresample SHARED IMPORTED)set_target_properties(swresample PROPERTIES IMPORTED_LOCATION ${ffmpeg_lib_dir}/libswresample.so)# 系统自动生成的自动库,该库的源文件是myapplication.cppadd_library( # Sets the name of the library. myapplication # Sets the library as a shared library. SHARED # Provides a relative path to your source file(s). myapplication.cpp )# Searches for a specified prebuilt library and stores the path as a# variable. Because CMake includes system libraries in the search path by# default, you only need to specify the name of the public NDK library# you want to add. CMake verifies that the library exists before# completing its build.find_library( # Sets the name of the path variable. log-lib # Specifies the name of the NDK library that # you want CMake to locate. log )# Specifies libraries CMake should link to your target library. You# can link multiple libraries, such as libraries you define in this# build script, prebuilt third-party libraries, or system libraries.# 链接库文件target_link_libraries(myapplication avformat avcodec avutil swresample # 其他FFmpeg依赖库按需添加 ${log-lib} )
build.gradle文件(不完全)
android { compileSdk 30 defaultConfig { applicationId "com.example.myapplication" minSdk 28 targetSdk 30 versionCode 1 versionName "1.0" testInstrumentationRunner "androidx.test.runner.AndroidJUnitRunner" sourceSets.main { jniLibs.srcDirs = ['jniLibs']// This prevents the auto generation of Android.mk } } buildTypes { release { minifyEnabled false proguardFiles getDefaultProguardFile('proguard-android-optimize.txt'), 'proguard-rules.pro' } } compileOptions { sourceCompatibility JavaVersion.VERSION_1_8 targetCompatibility JavaVersion.VERSION_1_8 } externalNativeBuild { cmake { path file('src/main/cpp/CMakeLists.txt') version '3.18.1' } } ndkVersion '21.4.7075529'}
最主要的是这两块文件,其它文件参考博文里写的就可以
PS:关于如何批量生成FFmpeg的JNI代码,查阅我主页的相关博文
