12.1、启动在三个主节点执行:
systemctl enable--nowetcd
查看etcd是否启动成功
[root@k8s-master01 etcd-v3.5.11-linux-amd64]● etcd.service - Etcd Server Loaded: loaded (/usr/lib/systemd/system/etcd.service;enabled;vendor preset: disabled)Active: active (running)since 一 2024-04-08 23:23:31 CST;26s ago Main PID: 9623(etcd)CGroup: /system.slice/etcd.service └─9623 /usr/local/bin/etcd --name=k8s-master01 --data-dir=/var/lib/etcd/default.etcd --listen-peer-urls=http://192.168.115.11:2380 --listen-client-urls=http://192.168.115.11:2379,http://127.0.0.1:2379 --advertise-client-urls=http://192.168.115.11:2379 --initial-advertise-...4月 08 23:23:33 k8s-master01 etcd[9623]: {"level":"info","ts":"2024-04-08T23:23:33.169835+0800","caller":"rafthttp/stream.go:249","msg":"set message encoder","from":"9dabc06b927824f3","to":"1e93e73748d8f538","stream-type":"stream MsgApp v2"}4月 08 23:23:33 k8s-master01 etcd[9623]: {"level":"info","ts":"2024-04-08T23:23:33.169847+0800","caller":"rafthttp/stream.go:274","msg":"established TCP streaming connection with remote peer","stream-writer-type":"stream MsgApp v2","local-member-id":"9dabc06b9...d":"1e93e73748d8f538"}4月 08 23:23:33 k8s-master01 etcd[9623]: {"level":"info","ts":"2024-04-08T23:23:33.169911+0800","caller":"rafthttp/stream.go:412","msg":"established TCP streaming connection with remote peer","stream-reader-type":"stream Message","local-member-id":"9dabc06b927...d":"1e93e73748d8f538"}4月 08 23:23:35 k8s-master01 etcd[9623]: {"level":"info","ts":"2024-04-08T23:23:35.599089+0800","caller":"etcdserver/server.go:2580","msg":"updating cluster version using v2 API","from":"3.0","to":"3.5"}4月 08 23:23:35 k8s-master01 etcd[9623]: {"level":"info","ts":"2024-04-08T23:23:35.61736+0800","caller":"membership/cluster.go:576","msg":"updated cluster version","cluster-id":"7d449573da26fc1a","local-member-id":"9dabc06b927824f3","from":"3.0","to":"3.5"}4月 08 23:23:35 k8s-master01 etcd[9623]: {"level":"info","ts":"2024-04-08T23:23:35.617467+0800","caller":"etcdserver/server.go:2599","msg":"cluster version is updated","cluster-version":"3.5"}4月 08 23:23:37 k8s-master01 etcd[9623]: {"level":"warn","ts":"2024-04-08T23:23:37.046053+0800","caller":"rafthttp/probing_status.go:82","msg":"prober found high clock drift","round-tripper-name":"ROUND_TRIPPER_RAFT_MESSAGE","remote-peer-id":"1e93e73748d8f538"...","rtt":"14.778195ms"}4月 08 23:23:37 k8s-master01 etcd[9623]: {"level":"warn","ts":"2024-04-08T23:23:37.046076+0800","caller":"rafthttp/probing_status.go:82","msg":"prober found high clock drift","round-tripper-name":"ROUND_TRIPPER_RAFT_MESSAGE","remote-peer-id":"9c555681cd4d45b4"…421s","rtt":"172.218µs"}4月 08 23:23:37 k8s-master01 etcd[9623]: {"level":"warn","ts":"2024-04-08T23:23:37.0461+0800","caller":"rafthttp/probing_status.go:82","msg":"prober found high clock drift","round-tripper-name":"ROUND_TRIPPER_SNAPSHOT","remote-peer-id":"1e93e73748d8f538","cloc...","rtt":"14.779498ms"}4月 08 23:23:37 k8s-master01 etcd[9623]: {"level":"warn","ts":"2024-04-08T23:23:37.046036+0800","caller":"rafthttp/probing_status.go:82","msg":"prober found high clock drift","round-tripper-name":"ROUND_TRIPPER_SNAPSHOT","remote-peer-id":"9c555681cd4d45b4","cl…3306s","rtt":"121.37µs"}Hint: Some lines were ellipsized, use -lto show infull.[root@k8s-master01 etcd-v3.5.11-linux-amd64]etcd Version: 3.5.11Git SHA: 3b252db4fGo Version: go1.20.12Go OS/Arch: linux/amd64[root@k8s-master01 etcd-v3.5.11-linux-amd64]1e93e73748d8f538, started, k8s-master03, http://192.168.115.13:2380, http://192.168.115.13:2379, false9c555681cd4d45b4, started, k8s-master02, http://192.168.115.12:2380, http://192.168.115.12:2379, false9dabc06b927824f3, started, k8s-master01, http://192.168.115.11:2380, http://192.168.115.11:2379, false
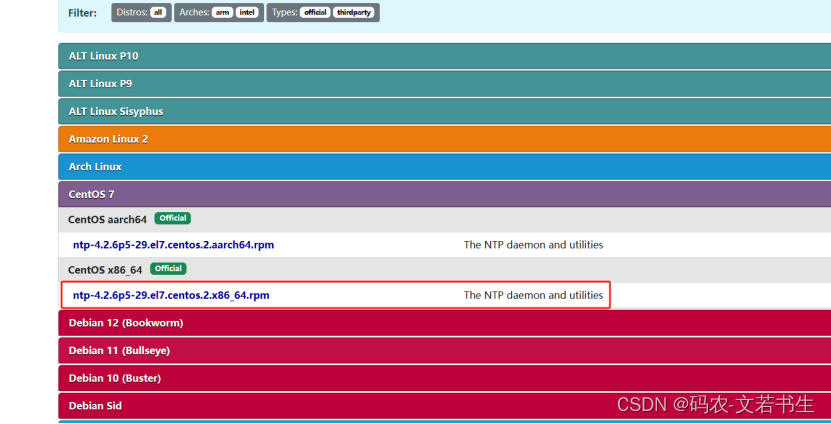
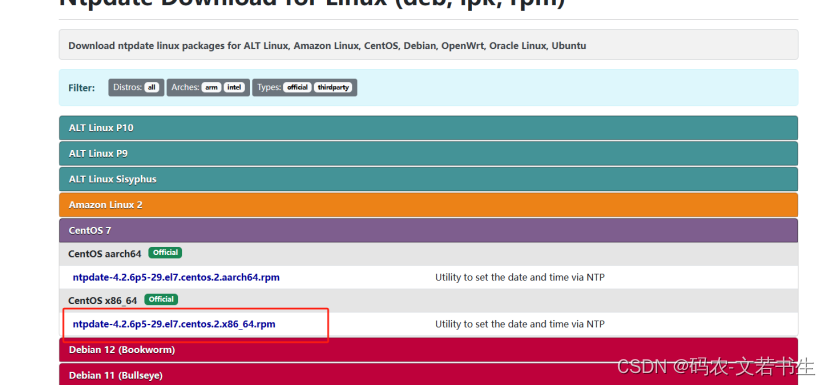
11、下载
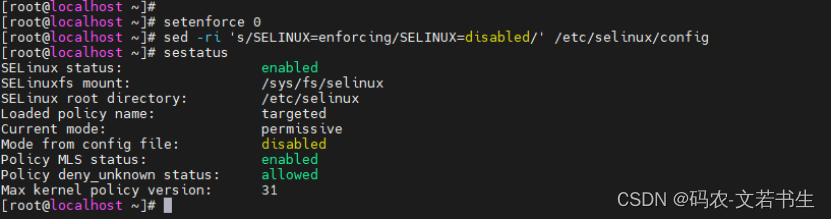
14.3、也就有可能选择了LOCAL作为Server进行同步,而不与远程Server进行同步。ipvsadm本次安装使用的景象ipset已经安装了不再安装,仅安装ipvsadm
7.1、也就有可能选择了LOCAL作为Server进行同步,而不与远程Server进行同步。k8s-master01安装
在第一个主节点k8s-master01操作 :
生成kubeadm-config.yaml配置文件
kubeadm config print init-defaults --component-configs KubeletConfiguration >kubeadm-config.yamlkubeadm config print init-defaults --component-configs InitConfigurationkubeadm config print init-defaults --component-configs ClusterConfiguration
修改kubeadm-config.yaml配置文件,如下面的配置文件,需要修改和添加的部分包括:
(1)advertiseAddress处 改为 k8s-master01的IP
(2)添加或修改nodeRegistration: 对应的配置
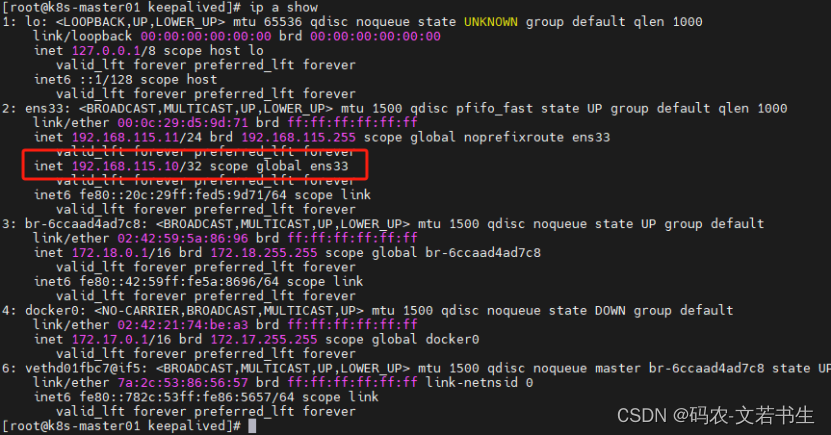
(3)添加certSANs 处配置,配置为keepalived VIP地址
(4)修改etcd配置
(5)修改imageRepository配置
(6)添加controlPlaneEndpoint处配置,配置为VIP:16443
apiVersion: kubeadm.k8s.io/v1beta3bootstrapTokens:- groups: - system:bootstrappers:kubeadm:default-node-token token: abcdef.0123456789abcdef ttl: 24h0m0s usages: - signing - authenticationkind: InitConfigurationlocalAPIEndpoint: advertiseAddress: 192.168.115.11 bindPort: 6443nodeRegistration: criSocket: unix:///var/run/cri-dockerd.sock imagePullPolicy: IfNotPresent name: k8s-master01 taints: null---apiServer: certSANs: - 192.168.115.10 timeoutForControlPlane: 4m0sapiVersion: kubeadm.k8s.io/v1beta3certificatesDir: /etc/kubernetes/pkiclusterName: kubernetescontrollerManager: {}dns: {}etcd: external: endpoints: - http://192.168.115.11:2379 - http://192.168.115.12:2379 - http://192.168.115.13:2379imageRepository: 192.168.115.11:81kind: ClusterConfigurationkubernetesVersion: 1.30.0networking: dnsDomain: cluster.local podSubnet: 10.244.0.0/16 serviceSubnet: 10.96.0.0/12controlPlaneEndpoint: "192.168.115.10:16443"---apiVersion: kubeproxy.config.k8s.io/v1alpha1kind: KubeProxyConfigurationmode: ipvs---apiVersion: kubelet.config.k8s.io/v1beta1authentication: anonymous: enabled: falsewebhook: cacheTTL: 0s enabled: truex509: clientCAFile: /etc/kubernetes/pki/ca.crtauthorization: mode: Webhook webhook: cacheAuthorizedTTL: 0s cacheUnauthorizedTTL: 0scgroupDriver: systemdclusterDNS:- 10.96.0.10clusterDomain: cluster.localcontainerRuntimeEndpoint: ""cpuManagerReconcilePeriod: 0sevictionPressureTransitionPeriod: 0sfileCheckFrequency: 0shealthzBindAddress: 127.0.0.1healthzPort: 10248httpCheckFrequency: 0simageMaximumGCAge: 0simageMinimumGCAge: 0skind: KubeletConfigurationlogging: flushFrequency: 0options: json: infoBufferSize: "0"text: infoBufferSize: "0"verbosity: 0memorySwap: {}nodeStatusReportFrequency: 0snodeStatusUpdateFrequency: 0srotateCertificates: trueruntimeRequestTimeout: 0sshutdownGracePeriod: 0sshutdownGracePeriodCriticalPods: 0sstaticPodPath: /etc/kubernetes/manifestsstreamingConnectionIdleTimeout: 0ssyncFrequency: 0svolumeStatsAggPeriod: 0s
K8s-master01执行命令
kubeadm init --configkubeadm-config.yaml --upload-certs --v=9
执行完后成功后会生成一些配置信息,如下
Your Kubernetes control-plane has initialized successfully!To start using your cluster, you need to run the following as a regular user: mkdir-p$HOME/.kube sudocp-i/etc/kubernetes/admin.conf $HOME/.kube/config sudochown$(id-u):$(id-g)$HOME/.kube/configAlternatively, ifyou are the root user, you can run: exportKUBECONFIG=/etc/kubernetes/admin.confYou should now deploy a pod network to the cluster.Run "kubectl apply -f [podnetwork].yaml"with one of the options listed at: https://kubernetes.io/docs/concepts/cluster-administration/addons/You can now joinany number of the control-plane noderunning the following commandon each as root: kubeadm join192.168.115.10:16443 --tokenabcdef.0123456789abcdef \--discovery-token-ca-cert-hash sha256:3c85f66540e67437ba4db122a736ba3aafb53443961be2605fbc0f9900196ef0 \--control-plane --certificate-key 3e9843a94c319853455ff67515b84345066363395622438f8a06d10ca75b81b8Please note that the certificate-key gives access to cluster sensitive data, keep it secret!As a safeguard, uploaded-certs will be deleted intwo hours;If necessary, you can use"kubeadm init phase upload-certs --upload-certs"to reload certs afterward.Then you can joinany number of worker nodes by running the following on each as root:kubeadm join192.168.115.10:16443 --tokenabcdef.0123456789abcdef \--discovery-token-ca-cert-hash sha256:3c85f66540e67437ba4db122a736ba3aafb53443961be2605fbc0f9900196ef0
其中两处join拷贝出来待用。k8s-master01安装